Homelab Series, Part 0: What’s a homelab anyways?

Welcome back! Today we’re going to be starting a series about my homelab adventures and exploring some of the lessons learned, thoughts behind it, and how I’ve put these technologies into practice to make my life easier and more secure. We’ll start with the basics: What’s a homelab and why did I start making one?

A homelab is usually considered to be computers or electronics (routers, firewalls, networking for instance) that a person would use to self host software, test new software/applications, and keep their skills sharp. It’s important to note however that a homelab can be a wide range of hardware/software so it can be difficult to nail down an exact definition. Someone could be running a Raspberry Pi as a DNS server while another could be running enterprise server hardware in their basement. It’s really up to you, your plans, and budget.

I started my homelab adventures back in high school running an Ubuntu server with a LAMP stack to do website hosting. As I’ve gotten better hardware and new skills my homelab has evolved too. Going from a single dedicated server to a virtual machine host running VMWare ESXI free all the way to my current set up with a Proxmox cluster and a variety of small desktop PCs running services.

Hardware is going to be important for the direction of your homelab and how much you want to spend. Keep in mind: an older system may be cheaper but could potentially use a lot more power.

Here’s some hardware recommendations based on my own experiences:

  • Used Dell servers are cheap and usually reliable. I run a Dell R640 as the main VM host on my network and was bought for sub $400
  • Raspberry Pi’s are one of the main go-to’s for their low power usage and cost but their prices have been getting to be a bit much with some of the newer Pi 5’s going for over $100
  • Lenovo and Dell Small Form Factor (SFF) or Ultra-SFF/Mini PCs are both efficient and not super expensive. A Dell Optiplex 3070 SFF with a 6 core i5 can be found for 150 bucks with expansion for NVME and two SSDs in the 3.5″ tray
  • Older Macbooks or laptops can make small and sometimes powerful little servers. Couple this with a battery and you have your own built in battery backup should the power go out

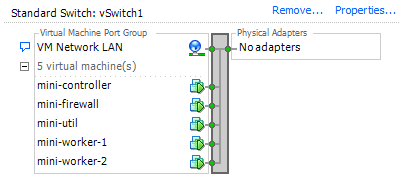
For software I tend to go for Linux and free open source (also known as FOSS). The vast majority of my environment is running some flavor of Linux which I’ll deep dive into more at a later date. I run Ubuntu for most of my stuff with FreeBSD (pfSense) and unRAID’s Slackware making an appearance. My hosts currently are running Proxmox in a small cluster though I was running the free version of ESXI in the past. On these Ubuntu hosts are running such things as docker, multiple of tools for network monitoring (Zabbix, Graylog, UptimeKuma) and services such as Nextcloud and Bookstack. I love the idea of free open source software so I tend to lean into this for the majority of my set up.

What are some of the long term lessons and experiences running all of this? Well, there’s a lot. One of the biggest lessons is the PLAN before making big changes. Having something to fall back on when things go hay-wire is a wonderful skill for both home and production; A summary, plan of execution and a plan for when it all goes wrong.

The second lesson: document everything you do. I use Bookstack as a personal and homelab document server. I try to update everything I do so I can reference things later (last update, last modification to config, etc) and also look for patterns if there’s issues (such as an intermittent drop of network hardware). I even have quick reference cheat sheets for things such as Linux and Proxmox notes and things I often reference from online. Having good documentation skills will help you immensely as your homelab and skills continue to grow.

I hope you’ve enjoyed the read! I’m planning a series on my homelab adventures in the near future and will continue to update as time allows, so please check back. Hope to see you again!

State of (my) Network: 2023

Welcome to AASullivan.com! I’ve been meaning to do this for a while, so here it is: The State of My Network. I’ve been planning to do an overview of my entire set up for some time now and I’ve finally kept everything in a consistent state now for a few months after many years of tinkering. A little background…

My home network (also known as my “home lab”) has been a long term project of mine to both try out new technologies and keep my skills sharp in a real server environment. It started in 2014 with a single server in my apartment running ESXI 3.5 on a system with a 6 core AMD CPU and 16GB of RAM. It was a blast to try new things (DNS server, file server, Plex, etc) and I’ve learned a lot since those times. My current Home Lab is considerably bigger now and is larger now than many small company systems; My poor power bill will never be the same. Let’s take a look at some of the set up!

To start with the basics, I’m running a pfSense firewall connecting out to a Verizon Fios gigabit connection. Going from this is a 48 port gigabit switch with 10GB SFP connections to a backbone 10GB SFP Microtek switch. I have 10GB between all servers and my desktop allowing regular speeds of around 550MB/s when going SSD to SSD. This is all the core backbone of my network. Time for the fun stuff.

I run a large number of self hosted services including, but not limited to:

  • PiHole DNS blocking
  • Plex
  • Home Assistant
  • Killing Floor 2 gameserver
  • Tiny Tiny RSS
  • NextCloud
  • Zabbix
  • Uptime Kuma
  • Bookstack
  • Graylog
  • …and many more

Most things are running on an ESXI 6.5 server. This is a 1U with 192GB RAM, dual 6 core Xeons and (6) 1TB SSDs in RAID 10. Along side this is two Unraid servers (Dual Dell R510) mirrored and both running multiple services. RIP power bill.

The original goal of this network and home lab was to learn more about some enterprise solutions and keep my skills sharp. Instead, I’ve built a network more robust than many small business networks with a lot more control and functionality.

Things I’ve learned while doing all of this:

  • Your power bill is going to suffer (worth it!)
  • Servers put out a LOT of heat. I often notice this even upstairs with the floor being hot over the servers in the basement
  • Server hardware gives you a ton of ways to troubleshoot things, often with LEDs and beep codes to help narrow down issues
  • Low power hardware options are out there but are often much more expensive up front
  • Knowing what’s going on in your network is awesome. Knowing everything that’s going on can also drive one nuts when you see how often items are connecting to the internet (Looking at you Windows 10 and IoT devices)
  • If you want to build something, searching the internet can give you a lot of ideas and input. Most of my projects were done in an afternoon after finding a new product and reviewing issues/installation

All in all, I’ve taken control of my network and as much as it can drives me nuts doing all the maintenance and updates, it has been very stable for years and it’s a very good feeling to know what’s going on with everything.

Keep in mind: this can all start with an old desktop computer running Docker or a few services to tinker with. I started this all with an Ubuntu 6.06 LAMP server in 2008 and has grown into the passion it is today.

Thanks for sticking through my brain dump, I hope you enjoyed the read and will stop by again. Cheers!

VMWare Kubernetes Cluster Build Notes

I built a Kubernetes cluster tonight to try and learn a bit about this technology, here are my notes about building it!

Built on a new ESXI server with the following specs (you’d be surprised how well this rig holds up):

  • Dell Optiplex 7010
  • Core i7-3770
  • 32GB RAM
  • 1TB SSD

Created virtual network only accessible to VMs:

Used pfSense as firewall to keep independent from network and to provide DHCP to internal virtual network. Used a single Windows Server 2019 VM to access WebGUI to control pfSense. Needlessly complicated to do all of this but I wanted to get a virtual network going to test all of this out on.

Built the following VMs on Ubuntu 22.04 LTS:

  • Controller: 2 vCPUs, 4GB RAM, 50GB HDD
  • Worker X2: 2 vCPUs, 4GB RAM, 25GB HDD

I then set all their IPs in pfSense to keep them from changing. I then used the following guide, specifically the scripts from github mentioned in the article:

https://devopscube.com/setup-kubernetes-cluster-kubeadm/

Command to download scripts:

git clone https://github.com/techiescamp/kubeadm-scripts

Chmod+x both scripts to set executable. Run the “common.sh” script on all systems, both controller and nodes/workers. Edit the “master.sh” script. Change the “MASTER_IP=” portion to your controller’s IP address. Change the network range as needed for the nodes under “POD_CIDR” (I left these as default). Run the script on the controller.

Run this command to get the join command:

kubeadm token create --print-join-command

Run the FULL output on any workers/nodes you want to connect to it. Check connection on master/controller:

kubectl get nodes

Example output:

Note that their roles are set to “none”. Fix by running this command, substituting out the names of the nodes/workers:

kubectl label node mini-worker-1 node-role.kubernetes.io/worker=worker

Then check again to confirm they are now workers:

Congrats! You now have a (slightly dirty) Kubernetes cluster running and ready to assign deployments to! This is the bare basics but should get you rolling, good luck and happy tinkering!